Here is the step-by-step process to connect a Twitch source to the Dashboard.

Here are the different steps to connect a Twitch channel. The Twitch connection funnel starts at step 3:
1. Source management
 From the menu sidebar, go to Settings > Sources.
The 'sources' page is the main section to manage any account and page: connection, credential refresh, reconnection, and status check.
2. Connection roles
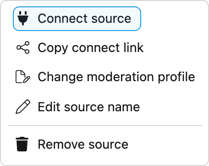
Our Customer Success team is in charge of creating the sources, but the user has to connect them. There are two options to connect a source, depending on the person performing the connection and their role.
Option 1 : you are the user performing the connection. You can directly click on the options of the source you want to connect, and access 'connect source'.
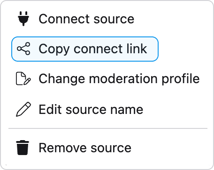
Option 2 : someone else performs the connection.
Click on the button below, and share the copied link to the person who will connect the source.
You will be redirected to this welcome page, where you can choose the type of source you want to connect.

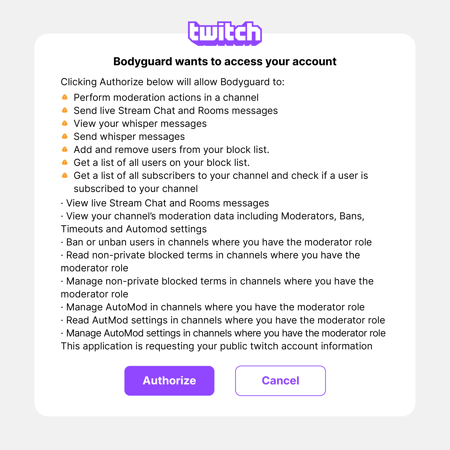
3. Permissions
This is where the Twitch connection funnel starts. You will be asked to authorize Bodyguard to access specific information.

By proceeding, you will be redirected to the Twitch interface to grant access to Bodyguard:
4. Channel selection
Back to the Bodyguard interface, you will need to select the channels you want protected:

5. Confirmation
If any error occurs, you will get a pop-up message explaining the situation and the next steps. If not, you will be all done!

If you need any assistance or support during the connection of your sources, reach out to our Customer Success Team using help@bodyguard.ai.